Often there are situations where you are checking some user events and are wondering how to check which one was first, which was the next one, which was the last. Although there are several options to do that – they are all too clumsy to use them on regular basis (for example – using the GA User Explorer or even the worst option – using 3 extra dimensions in custom report for date/hour/minutes). That’s why it’s a great idea to add your own timestamp to all of your GA tags.
The following tracking is easy to implement with Google Tag Manager, requires a little JS coding and it’s extremely easy to use in daily basis. You will have easy-to-read timeline whenever you need it without any hassle. Even more – if you use it with the Client ID Tracking – you will have your own User Explorer!
Without further ado – here are the steps to implement Time Tracking to your GTM Tags:
Prepare GA for the Timestamp Tracking
First – create new Custom Dimension in your Google Analytics Account and name it however you like (don’t forget to remember the index when you create it). Make the dimension Hit Based, as you want to keep every hit separated with it’s own timestamp!

Create the Timestamp JS Variable in GTM
function() {
 try {
  var timestamp = new Date();
  var time = timestamp.toString().split(' ');
  return time[3]+ " " +time[1]+ " " +time[2]+ " "+time[4];
 } catch(e) {
  return "unknown";
 }
}
This little JS snippet will return the timestamp of the hit in format YYYY MM DD HH:MM:SS.
The reason to use this format is simple – it’s the easiest way to order the hits by ascending/descending order. If you want another format you can just swap the 5th row values (time[0] is the Day of the Week, time[1] is the month, time[2] is the day, time[3] is the year, time[4] is the time, time[5] is the timezone).
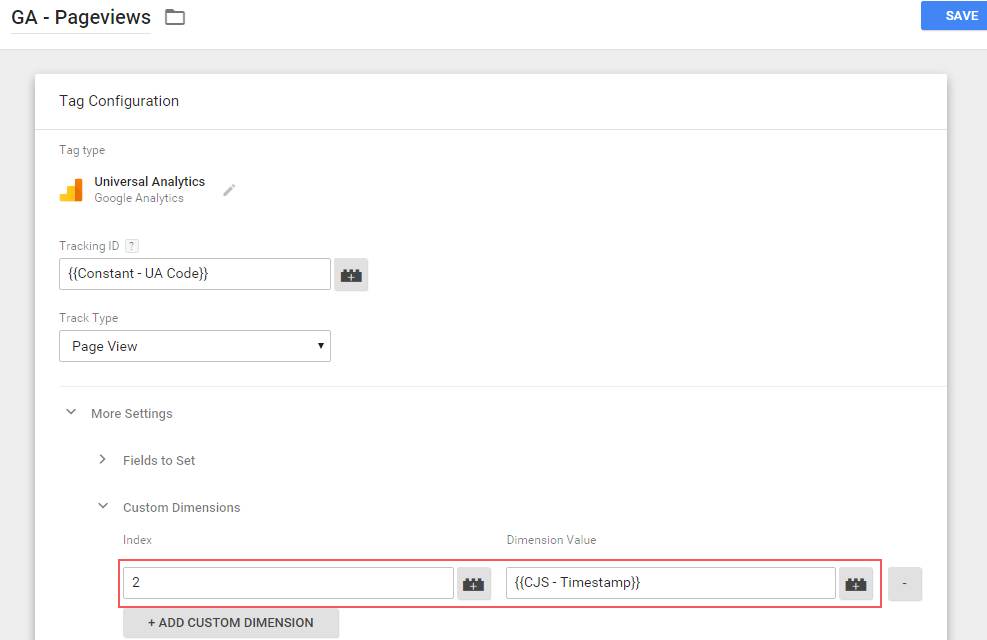
Connect your tags with the Timestamp Variable
 Congratulations! Now you have your own histogram of all events, the easy way. If you want to check the order of pageviews/events – just add secondary dimension “Timestamp” (or however you named your custom dimension) and you are done.
Don’t forget to add this as custom dimension in ALL of your analytics tags (current and future ones)!
4 Comments
How can this be done with GA4?
How do you use timestamps in the Dashboard?
Great article. Thanks a lot.